We offer a wide collection of free, high-quality printable coloring pages for kids and adults. From cute animals to intricate mandalas, our designs bring creativity and relaxation to everyone. Download, print, and start coloring today!

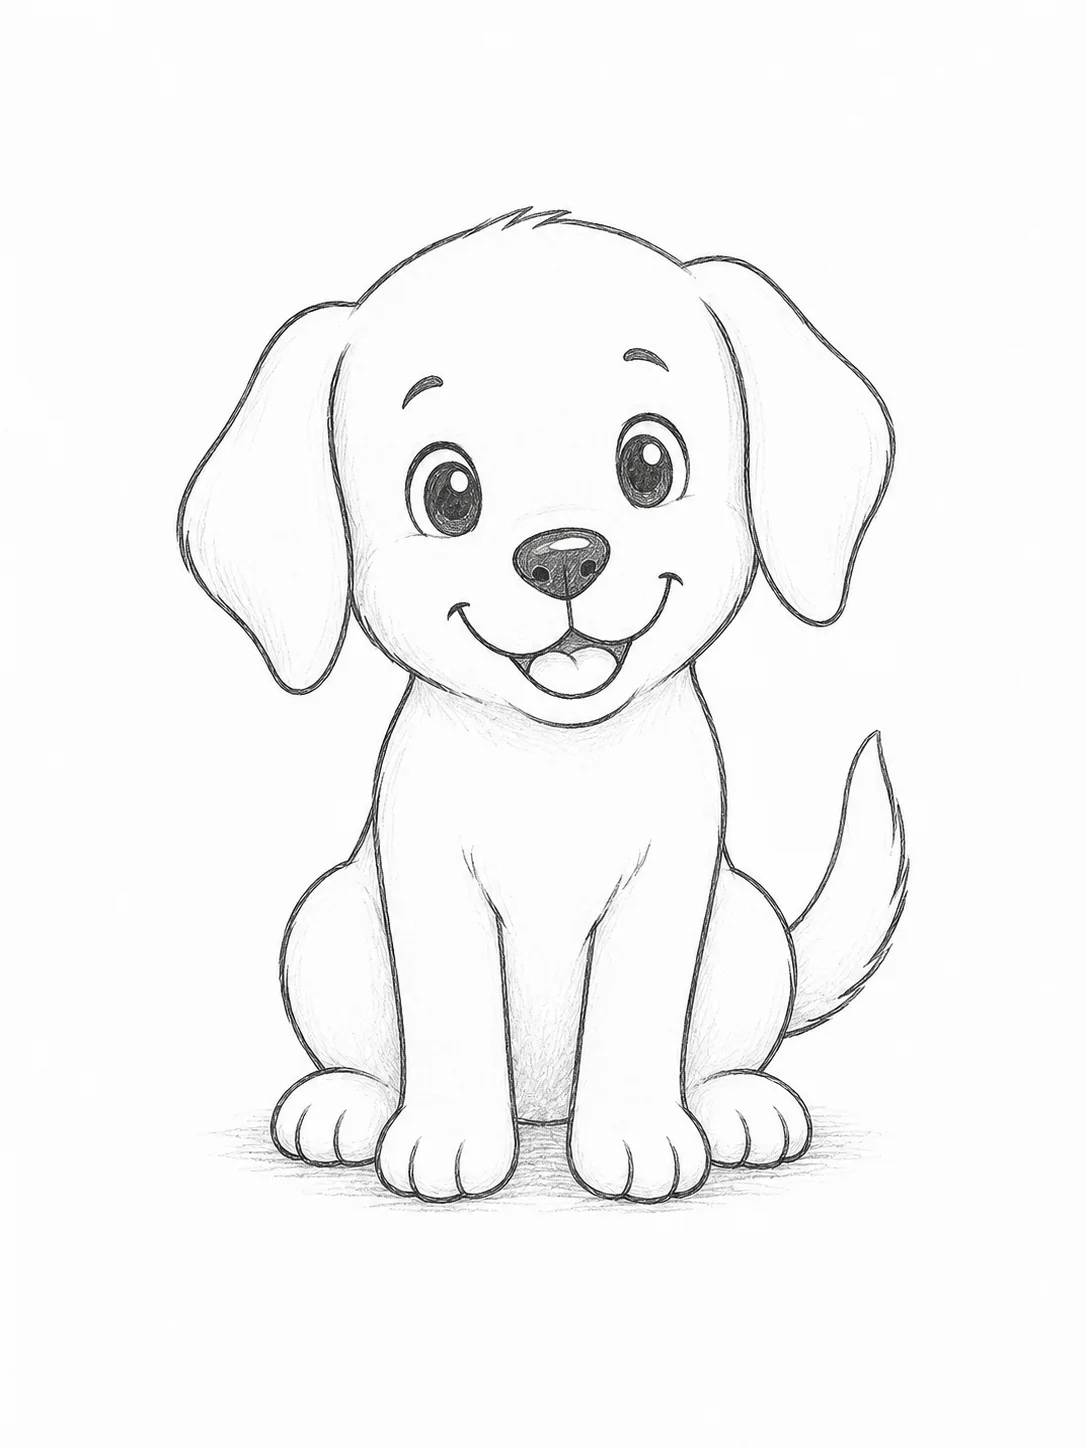
Drawing a dog may look tricky at first, but it becomes much easier when you build the picture one simple shape at a time. In this tutorial, you’ll learn how to draw a dog using basic circles, curved lines, and gentle details that are perfect for beginners. Whether you’re searching for how to draw a dog easy, how to draw a dog for kids, or simply want a clean dog outline, this lesson will guide you through every stage without feeling overwhelming. Take your time with each step, keep your pencil strokes light, and remember that every artist improves through practice. By the end, you’ll have a friendly dog drawing that’s ready to color and personalize.
If you enjoy drawing animals, don’t miss our complete collection of cute animal tutorials in How to Draw Cute Animals.
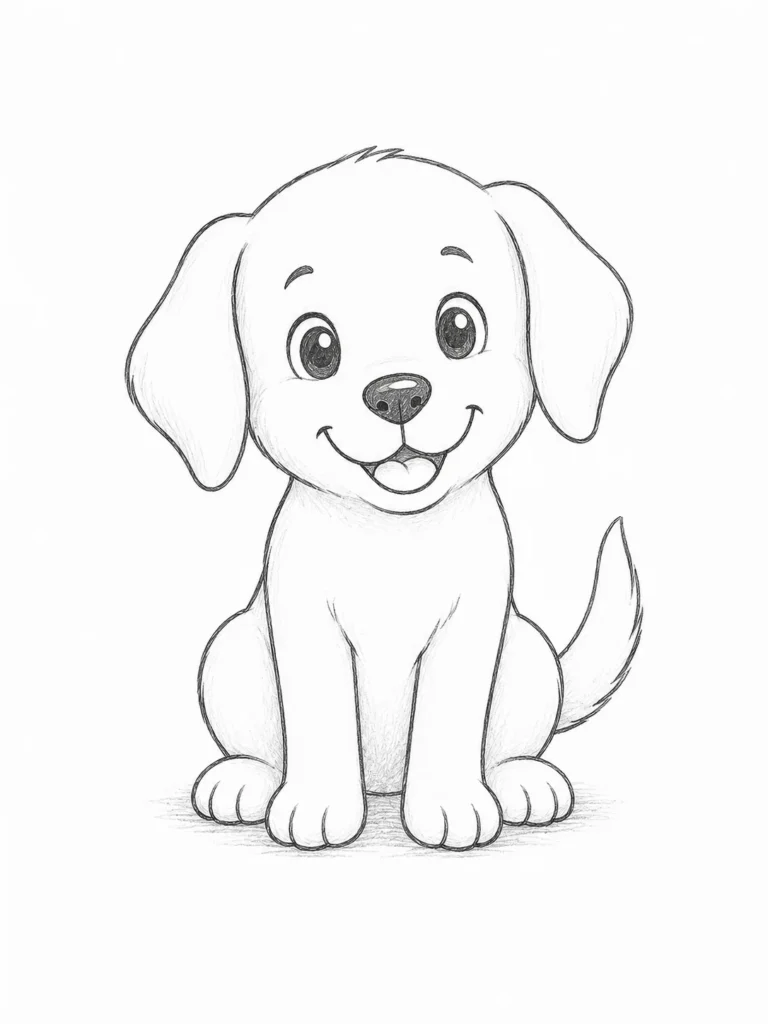
Table of Contents
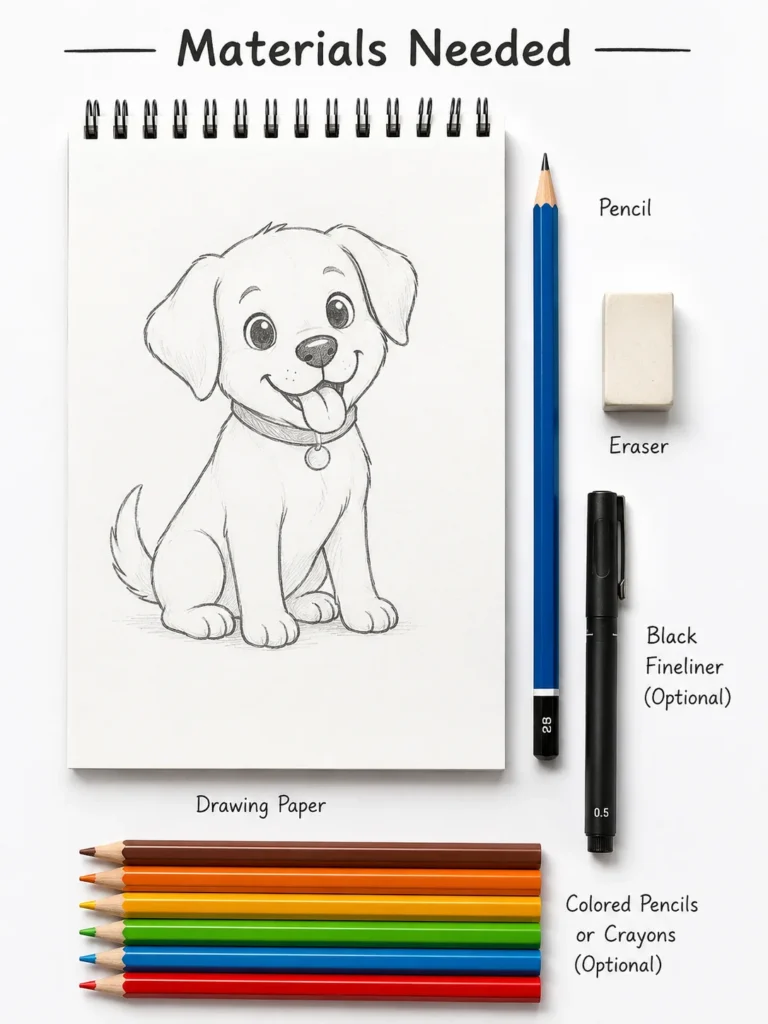
Materials Needed
You only need a few basic supplies:
- Pencil
- Eraser
- Black fineliner (optional)
- White drawing paper
- Colored pencils, crayons, or markers
How to Draw a Dog Tutorial
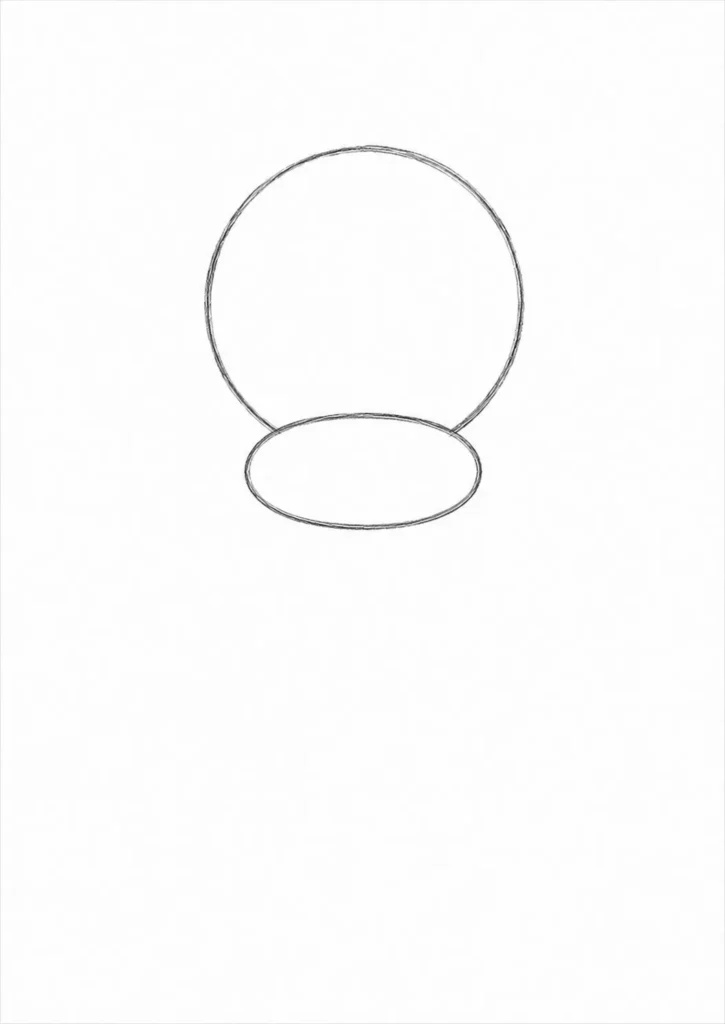
Step 1: Draw the Head Circle
Begin by drawing a medium-sized circle near the upper center of your page. This circle becomes the foundation for the dog’s head and helps keep everything properly proportioned. Don’t worry about making it perfectly round. A slightly soft circle often looks more natural. Keep your pencil strokes light because you’ll erase some construction lines later.
Many beginners immediately add facial details, but creating the head shape first makes the entire drawing much easier. Think of this circle as a guide rather than the finished outline. If the circle looks too small compared to your page, make it a little larger so you’ll have room for the body underneath.
Teacher’s Tip: Rotate your paper instead of twisting your wrist if drawing circles feels difficult.

Step 2: Add the Muzzle
Draw a slightly rounded oval attached to the lower half of the circle. This forms the dog’s muzzle, where the nose and mouth will go. Keep the oval centered so the face remains balanced. The muzzle should overlap the head circle slightly rather than floating below it.
A common mistake is making the muzzle too long, which can make the dog resemble another animal. Keeping it short creates a friendly, cute appearance that’s perfect for beginners and children.
Drawing Tip: Imagine the muzzle as a soft marshmallow instead of a sharp oval.
Step 3: Sketch the Ears
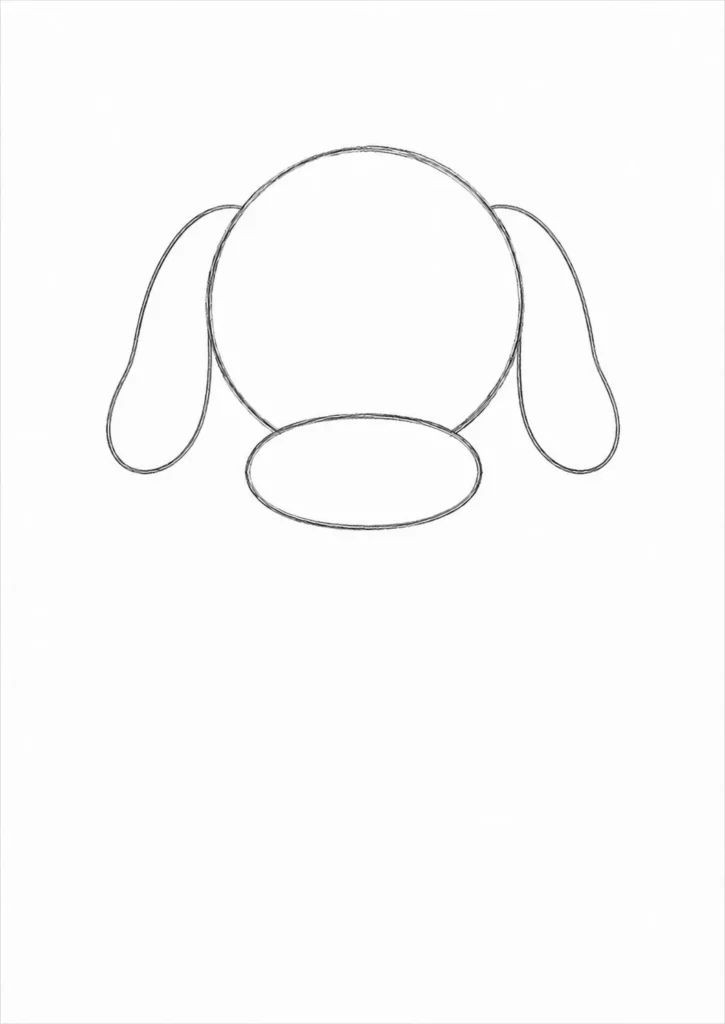
Add two floppy ears on each side of the head. Let each ear curve gently downward with soft rounded ends. They don’t need to match perfectly because real dogs have slightly different ear positions.
Large ears create a playful puppy look, while smaller ears make the dog appear older. Since this tutorial focuses on a cute beginner drawing, rounded floppy ears work best.
Many beginners draw pointed ears too early. Keeping them rounded makes the character much friendlier.
Teacher’s Tip: Compare both ears before darkening your lines.
Step 4: Draw the Face
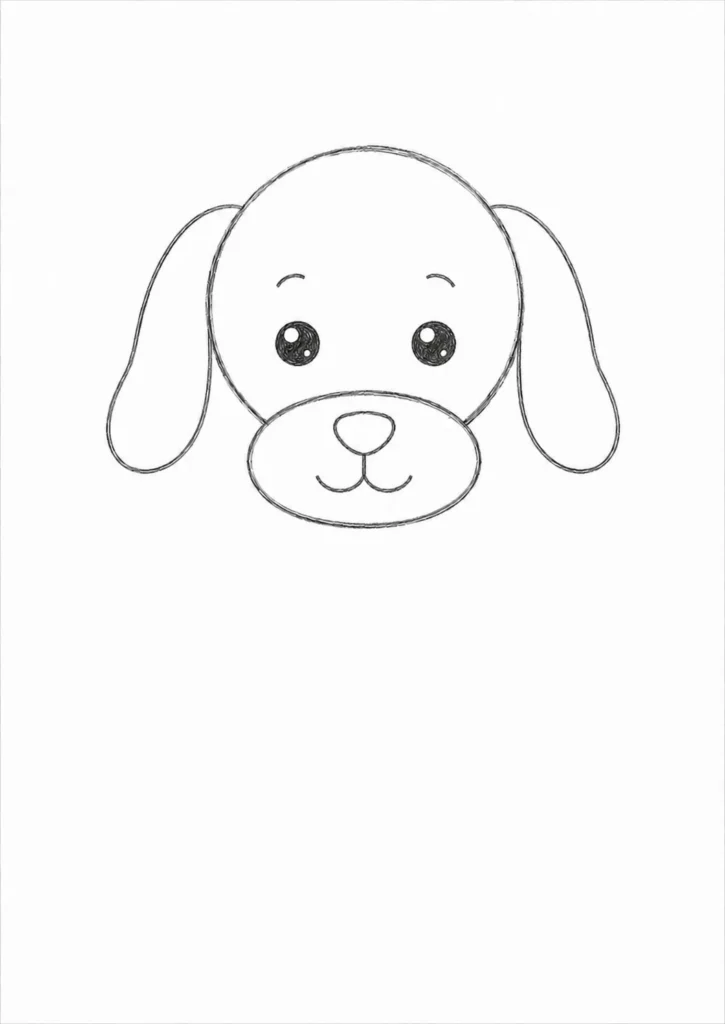
Inside the muzzle, add a small oval nose. Beneath it, draw a gentle curved smile. Above the muzzle, place two round eyes with small highlights left white. Tiny eyebrows can make your dog look extra friendly.
Avoid placing the eyes too close together or too high on the forehead. Keeping them evenly spaced creates a balanced expression.
Drawing Tip: Looking at both eyes together helps catch uneven placement before outlining.
Step 5: Draw the Body
Under the head, sketch a rounded oval for the body. Make it slightly wider than the head to give your dog a sturdy appearance. Connect the neck smoothly without sharp corners.
This simple body shape acts as the framework for the legs and tail. Beginners often draw the body too long, but a shorter oval creates a more charming cartoon-style dog.
Teacher’s Tip: Step back from your drawing for a few seconds to check the overall proportions.
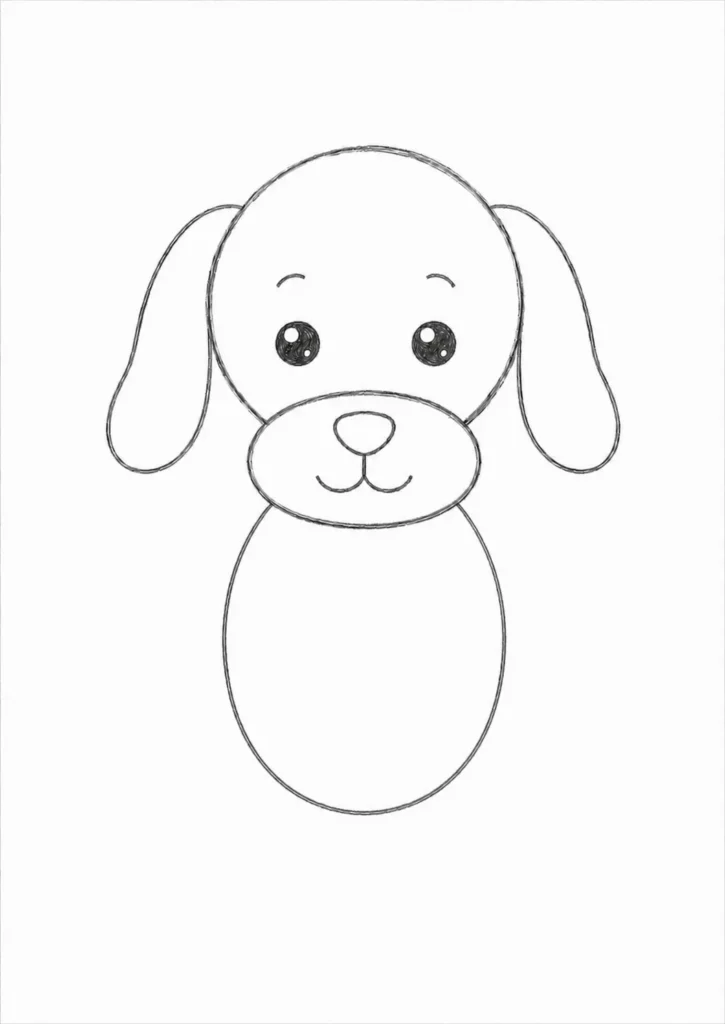
Step 6: Add the Legs and Paws
Draw two front legs extending downward from the body using straight, slightly rounded lines. Add two back legs near the rear of the body. Finish each foot with simple oval paws.
Don’t worry about muscle details. Simple shapes are easier to follow and look clean.
Many beginners make the legs different lengths. Comparing each pair before outlining helps keep the dog standing naturally.
Drawing Tip: Think of each leg as a soft rectangle with rounded corners.
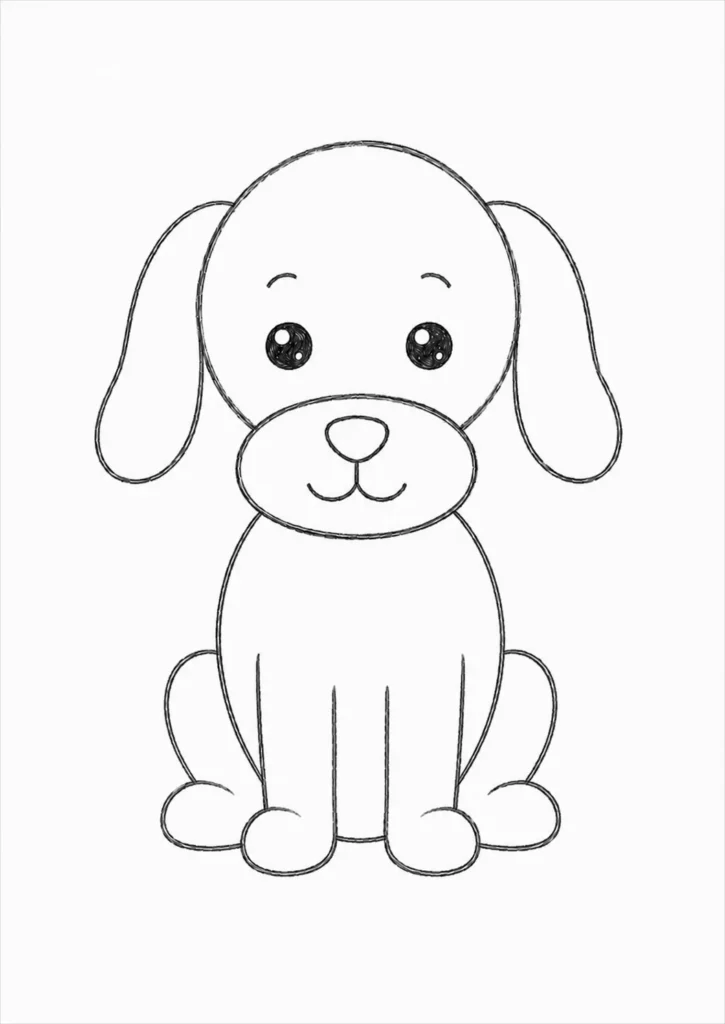
Step 7: Draw the Tail
Attach a curved tail near the back of the body. A slight upward curve makes the dog appear happy and energetic. Keep the tail fairly thick where it meets the body before tapering slightly toward the tip.
The tail helps give your drawing personality, so don’t be afraid to experiment with different curves in future sketches.
Teacher’s Tip: Gentle curves usually look more natural than sharp angles.
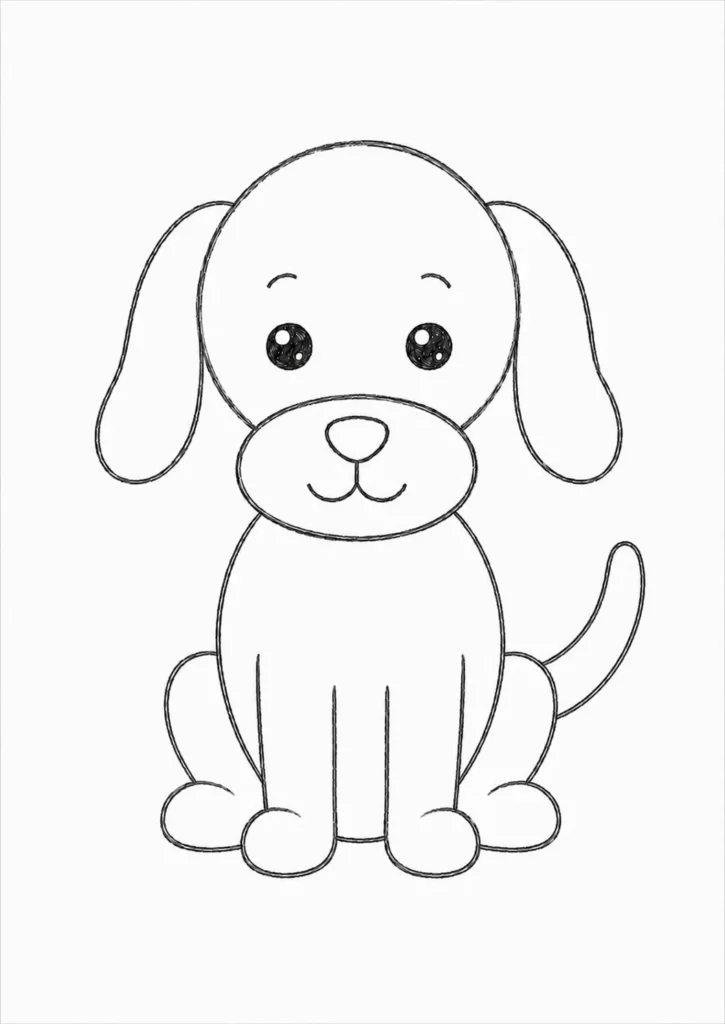
Step 8: Finish the Dog Outline
Erase the remaining construction lines and carefully darken the final outline. Add a few short fur lines around the ears, chest, and tail for texture without overcrowding the drawing.
Your dog is now complete. You can leave it as a clean pencil sketch or color it using your favorite supplies.
Remember, every finished drawing helps improve your observation and confidence.
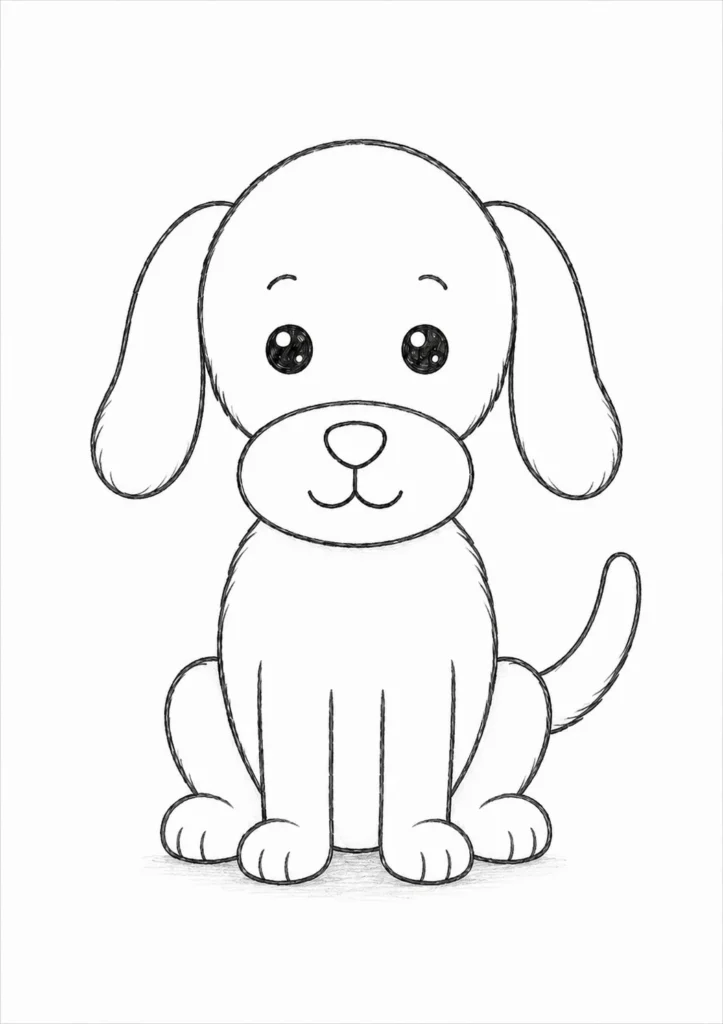
Drawing Tips
Learning how to draw a dog easy becomes much simpler when you use light construction lines and focus on one shape at a time. Practice drawing different ear shapes, tails, and facial expressions to create different dog breeds from the same basic outline. Remember that every sketch helps improve your observation and drawing skills.
Common Mistakes
One of the most common mistakes is making the head too small compared to the body. Another is pressing too hard with the pencil before you’re happy with the sketch. Try to keep your lines light until the final outline, and don’t worry if both sides aren’t perfectly symmetrical. Small differences often make a drawing feel more natural.
Coloring Ideas
Color your dog in classic shades like golden, brown, black, white, gray, or cream. You can also invent your own colorful puppy using blues, pinks, or rainbow patterns. Add a bright collar, a grassy yard, or a favorite toy to create a fun finished scene.
FAQs
How long does this drawing take?
Most beginners can complete this tutorial in about 20–30 minutes.
Is this tutorial suitable for children?
Yes. This lesson is designed as how to draw a dog for kids and works well for classrooms, homeschool activities, and family art time.
Can I draw a puppy instead?
Absolutely. Make the head slightly larger, shorten the legs, and add bigger eyes for a cute puppy appearance.
What if my drawing doesn’t look perfect?
That’s completely normal. Every drawing teaches you something new. Compare your newest sketch with your first one after a few practice sessions, and you’ll notice steady improvement.
Conclusion
You now know how to draw a dog using simple shapes that gradually become a finished illustration. Once you’ve mastered this drawing, try changing the ears, tail, or body shape to create different breeds and playful poses. The more often you practice, the more confident you’ll become, and each new drawing will feel easier than the last.
If you’re ready for another animal drawing adventure, continue with How to Draw a Cat, How to Draw a Bunny, How to Draw a Fox, or return to our complete collection in How to Draw Cute Animals.
You can also explore many more beginner-friendly tutorials:
- How to Draw a Dragon
- How to Draw a Horse
- How to Draw a Butterfly
- How to Draw a Fish
- How to Draw a Lion
- How to Draw a Shark
- How to Draw a Bear
- How to Draw a Dinosaur
- How to Draw a Snake
- How to Draw a Chicken
- How to Draw a Duck
- How to Draw a Panda
- How to Draw a Frog
- How to Draw a Bat
- How to Draw a Turtle
- How to Draw a Unicorn